
Sidebar
eso-tutorials
This is an old revision of the document!
Table of Contents
Important Information
- Enable “Autoloot” in your ESO Game options.
- Disable “Double-Tab to Evade” in your ESO Game options.
- Set “SubSampling” to “HIGH” in your ESO Graphic Options.
This Section is incomplete and currently rewritten. Please have a look at the “old” Guides, they may be a bit outdated, but should explain how everything works: Old Tutorials & Guides
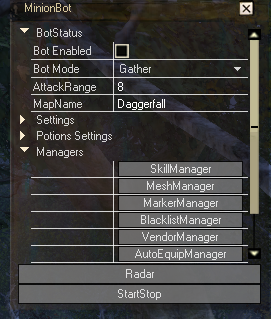
Bot Modes
Grind
Gather
Questing
Managers
Marker
ESO-Marker Manager
Click on the Mesh manager and load your mesh for the zone you are in.

Confirm you are on the proper mesh by ticking the box show navmesh. once you have confirmed you are on the mesh untick Show Nav mesh and close the marker manager.
Next you want to click on the Marker Manager button
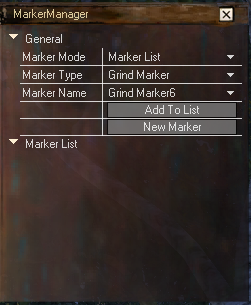
You have 3 different Marker Modes
- List: Will go through the list of markers in order either by Time or Level.
- Single Marker: Will Stay at the single marker.(Which is the marker in the Marker name Dropdown menu)
- Random Marker: Will go through the list of markers in a random order based on time.
You have 2 Different Marker Types
- Grind Marker: When the bot is in Grind Mode you use this marker to set where you would like to Grind. Controlled by time or level.
- Vendor Marker: When the bots bags are full or armor needs repairs the bot will search for a vendor in a radius around this marker.
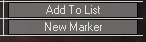
Marker Options/Buttons
- New Marker: Use this to creat a new marker at your current location.
- Add to List: Use this to add a marker to the list that has already been created.( You select these from the Marker Name Drop down Menu)
- Marker Name: is a Drop Down Menu for all the markers on the current mesh for the current marker type. You can select Markers from this menu to add to the Marker list
Once you selected your Marker Mode and Marker Type you now click the New Marker Button

Here you can Name the Marker set the level range for the marker or the Time(s) to spend at the marker.
Marker Options
- Name: Name of your marker.
- Time(s): Time to spend at this marker in seconds.(set to 0 to be controled only by level)
- Min Level: Min Level to start using this marker.
- Max Level: Max Level to finish using this marker.
- ContentID=: Example grind marker, if you put the mob ContentID here it will Fight only this mob
- NOT ContentID=: Example grind marker, if you put the mob ContentID here it will ignore this contentID.
- Higher Priority: When in Marker mode list it moves this marker Higher in the list priority.
- Lower Prioiryt: When in Marker Mode list, It moves this marker Lower in the list Priority.
Once you have set up the marker you should see this on your screen for the grind marker.

To set up a Vendor marker you set hte Marker Type to Vendor Marker
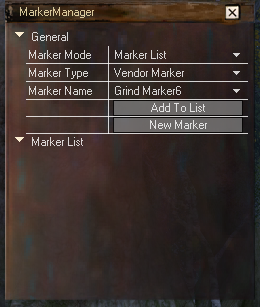
Click the New Marker Button
Then Leave the time(s) to 0 and leave the level range 1-50 that way you can always use this vendor.
Once you have clicked the New Marker Button and set up your marker you should see this on your screen.

Mesh
Skill
Advanced Settings
eso-tutorials.1434533091.txt.gz · Last modified: 2015/06/17 09:24 by fxfire