サイドバー
目次
Bot Modes / Botモード
Grind / レベリング
キャラクターコンフィグで、移送操作タイプがスタンダードになっていることを確認してください!!
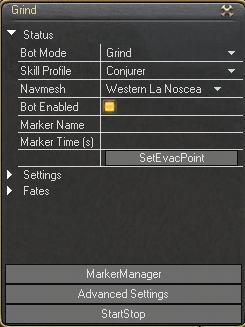
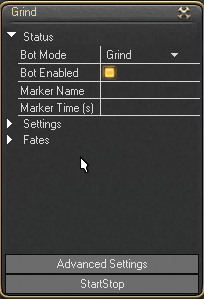
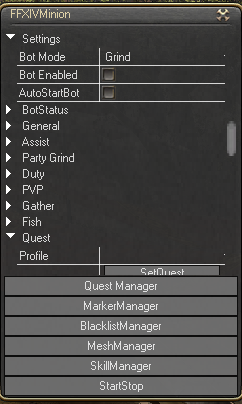
1. Bot Mode[モード] を Grind[レベリング] に設定します。
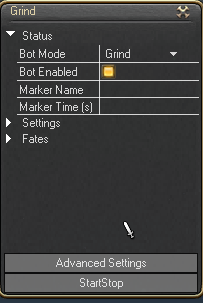
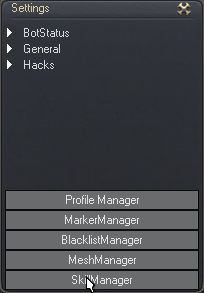
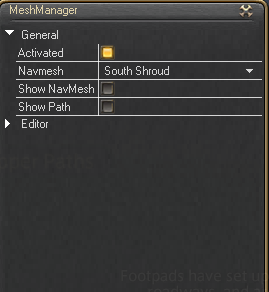
2. Grind[レベリング] モードでは あなたのいるエリアの Navmesh[メッシュ] を指定する必要があります。Advanced Settings[詳細設定] をクリックして Mesh Manager[メッシュマネージャー]を開きます。
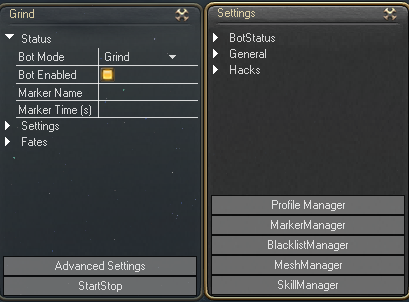
3. あなたのいるエリアに合った Navmesh[メッシュ] を選択します。 Show NavMesh[メッシュを表示] でメッシュが正しく読み込まれたかどうか確認することができます。
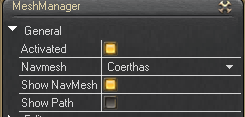
4. NaviMesh[メッシュ] が正しく読み込まれたら、Grind[レベリング] に合わせたマーカーを設定する必要があります。レベルや時間をマーカーに設定することができます。Advanced Settings[詳細設定] をクリックして Maker Manager[マーカーマネージャー]を開きます。
5. 1つのマーカーを使う場合はSingle Maker[シングルマーカー]、レベルや時間により複数のマーカーを切り替えたい場合はMarker List[マーカーリスト]を使います。
Maker Type[マーカータイプ] を Grind Maker[レベリングマーカー] にセットし、New Marker[マーカーを作成する] をクリックします。
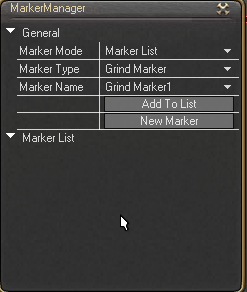
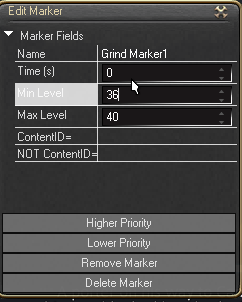
6. 新しく作成されたマーカーをクリックすると、マーカーの詳細設定を編集することができます。
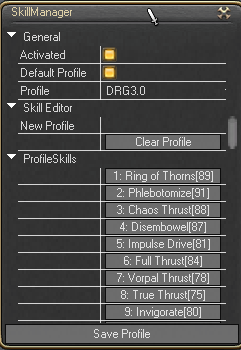
7. 次にクラス/ジョブに合ったSkillProfile[スキルプロファイル]を設定します。Advanced Settings[詳細設定] の Skill Manager[スキルマネージャー]を開きます。
デフォルトでクラスやジョブにあわせたProfileが設定されています。
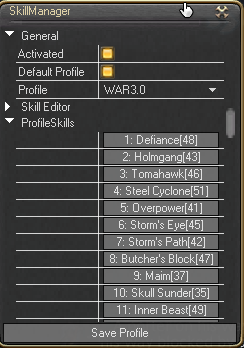
8. 以上の設定がすべて終わったら、Start/Stop[スタート/ストップ]ボタンを押すと開始されます。
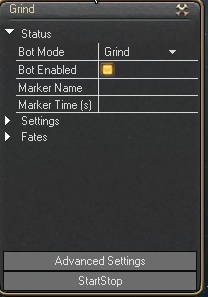
Fates / F.A.T.E.
Grind[レベリング] モードの Grind Marker[レベリングマーカー] に加え、Fatesの設定をすることでFATEに参加することができます。
1. Settings[設定]を開きます。

2. Do Fate[FATE参加] をオンにします
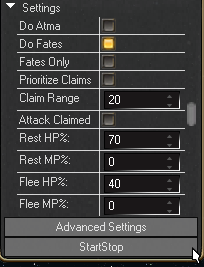
3. Grind Marker[レベリングマーカー] を全て無視したい場合は Fate Only[FATEのみ] をオンにします。
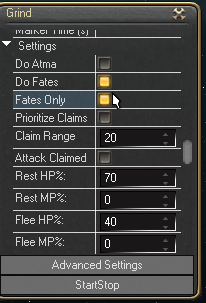
Atma / アートマ
Lv50でアートマクエストを受注している場合、Do Atma[アートマ収集] をオンにすることでアートマを集めることが出来ます。
Grind Settings
Grind Options:
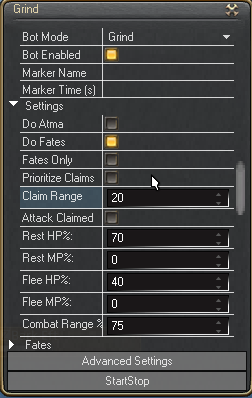
1. Prioritize Claims: works with Content ID from your grind markers. When Enableing Prioritize Claims the bot will try and gather all mobs within the Claim Range that match the content ID you put on the grind marker.
Claim Range sets how far the bot will look for Mobs when you enable Prioritize Claims.
Attack Claimed will attack mobs that are claimed by other people/groups.
2. Combat Range% is for ranged classes. This setting is % value of your max range. so if your max range is 25yalm setting this setting to 90% will have you try to attack the mob when you are about 20 yalms away.
FATE Options:
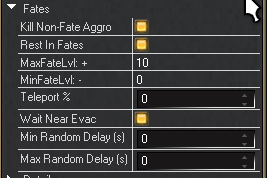
1. Rest in fates will enable you to rest when the HP/MP% value is reached after combat while doing fates.
2. MaxFatelvl:+ is how many levels above your current level you want to do fates. For example if you are level 20 and set it to +5 it will do fates up to level 25.
3. MinFatelLvl- is how many levels below your current level you want to do fates. For example if you are level 20 and you set it to -5 it will do fates as low as lvl 15.
4. WaitForcomplete% the bot will run to the edge of the fate and wait for what ever value you place in this box. For example 5%, the bot will wait till 5% of the fate is completed before joining.
5. Teleport % If the fate reaches a certain completed % the bot will simply telepot straight into the fate instead of running to it. Teleport must be on and no players within 30y of you.
6. Wait Near Evac: If this is enabled you will wait near your Evac point.
7. Min/Max Random Delay, The amount of time when a fate spawns your bot will wait before taking off to the fate. I.E. if you set it to 5/10 it will wait a random amount of time between 5seconds and 10 seconds to head to the fate.
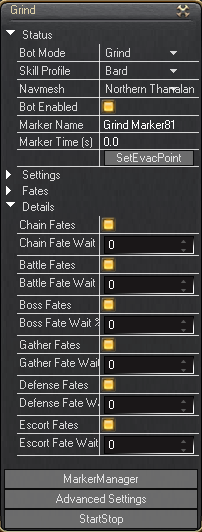
DETAILS:
Here you can choose which fate types you wish to do, or what % of completion each specific fate is at before attempting to join it.
Party Grind
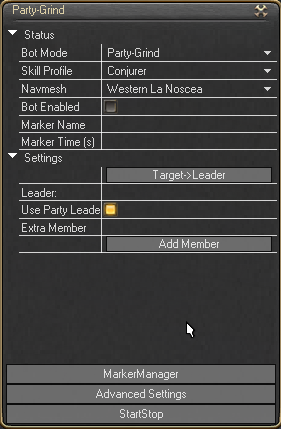
To set up Party Grind you need to set the Bot Mode to Party-grind.
Party Grind is for Grinding open world and requires a Navmesh to work. A typical set up would consist of a leader bot on Grind, or a player playing manually. Then other bots in party.
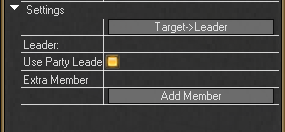
By using “Use Party Leader” and all groupped up the bots set to party grind will follow the leader around attack what the leader attacks.
Another set up for party grind would be boosting a lower level character with a higher level character. To do this the Higher level character would have to be out of party. So you would set the higher level character to party grind remove the tick in “Use Party Leader” then Target the character you want to follow and hit Target→Leader. This will cause the higher level bot to follow the lower level character around and kill what it kills.
Fish
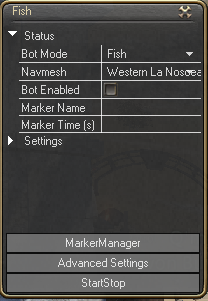
Fishing is very simple to set up. First Set the Bot Mode to Fish.
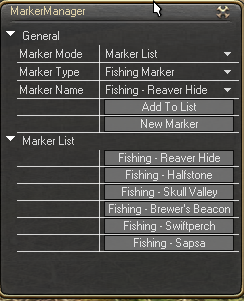
Next click Marker Manager(if you have any questions about settings here you should read the marker mananger tutorial)
Select the Marker you wish to edit or Create a new marker.
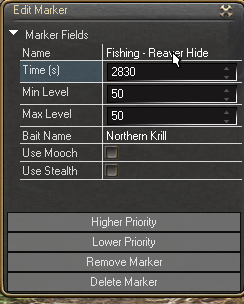
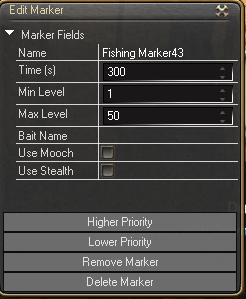
Marker Settings:
- Name: You can Change the Name of the marker.
- Time: You can adjust the duration the bot will stay at this marker.
- Min Level: Sets What level it will start using this marker.
- Max Level: Sets what level it will stop using this marker.
- Bate Name: The name of the bait you want to use at this marker
- Use Mooch: Enables the use of Mooch.
- Use Stealth: Enables the use of stealth at this marker.
Once you have all your markers set and configured enable the bot and begin fishing.
Gather
1. First thing you need to do is set your “Bot Mode” to “Gather”
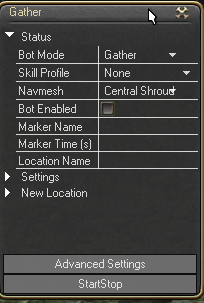
2. Next we need to set a Skill profile for your Gathering Class
 3. The NavMesh for the zone you are in should be loaded

4. Next you want to look at your Marker Manager(click Advanced Settings)
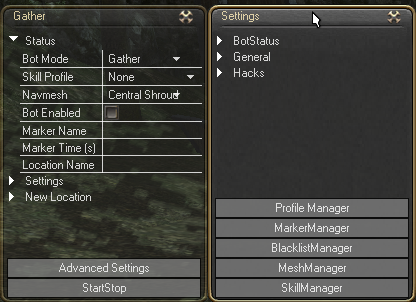
5. Click on Marker Manager
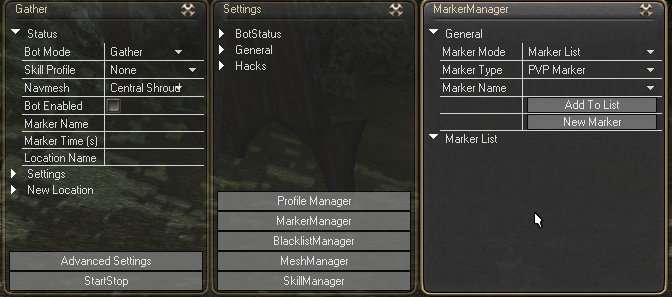
If you want to gather several markers set marker mode to list or random, if you want to gather from 1 Marker Set it to single.(Refer to the Marker Manager tutorial)
6. Make sure your Marker Type is set to the type of gathering you are doing.
7. Then you need to edit your Marker with the Time/level range and items you want to gather from the nodes at this marker.
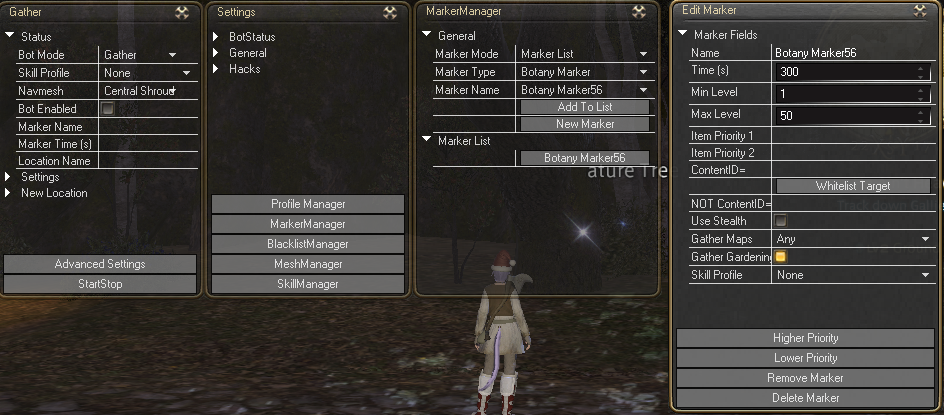
8. Make sure to set your Home location to the zone you are gathering in.
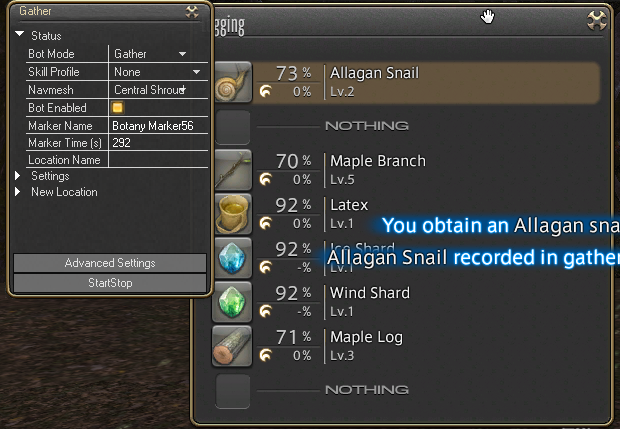
9. Once you have done that you are ready to start the bot.
Unspoiled
To start gathering unspoiled, some setup is required.
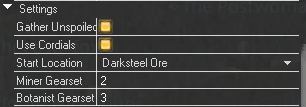
- First, Options
To gather unspoiled nodes, you must have:
- “Gather Unspoiled” on.
- “Use Cordials” (only effective for unspoiled nodes right now) - optional. The bot will use a cordial if the required GP set by the marker is more than 50 greater than your current GP upon reaching the node. Other considerations may be later added.
- “Start Location” - a proper starting location must be selected before starting the bot, one that is current up right now, or will within a game hour or 2 is most effective.
- “Miner Gearset” - the in-game # associated with your mining gearset. If this number is wrong, the bot will be unable to change classes.
- “Botanist Gearset” - the in-game # associated with your botany gearset. If this number is wrong, the bot will be unable to change classes.
- Second, Markers:
- Placement:
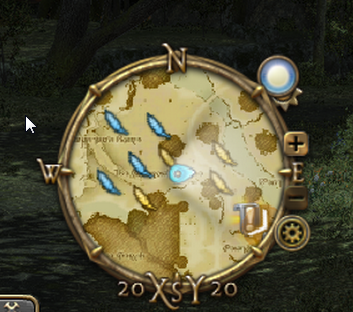
- Markers should be placed in an area where the node will be displayable on the minimap when it spawns (not as an arrow pointing somewhere else).
- Any markers placed outside of minimap radius are too far away and are likely to not be picked up by the scan.
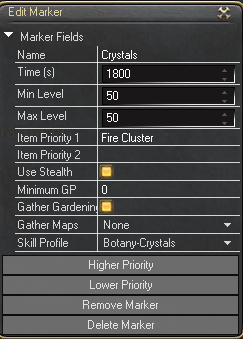
- New options and settings have been added to a new marker type - Unspoiled Markers.
- Minimum GP - sets the minimum GP requirement before the node interaction will begin, to ensure proper skill profile usage.
- Gather Gardening - allows gardening items to be gathered
- Gather Maps - select the type of map gathering to do
- Skill Profile - sets the skill profile to be used for specifically for this marker
- Marker Time and Levels have no bearing on unspoiled gathering.
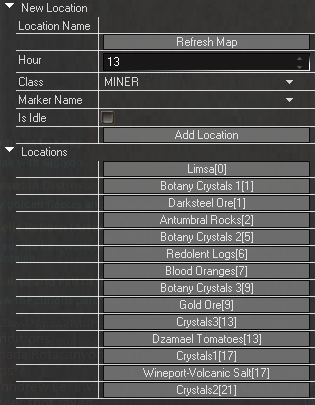
- Third, Locations:
- Once you have your markers, you can build your location. Most of the fields are self-explanatory. Locations must be managed while your character is on the map you will be using for the location. There are many reasons for this, and they cannot be avoided, so just do it.
- Location Name - some friendly name you'll recognize
- Hour - the hour that the node actually spawns (0-23), where 0 is 12AM, 23 is 11 PM, etc.
- Class - which class is required for the node type at this location
- Refresh Map - use this button to refresh the list of available markers on this map.
- Marker Name - the marker which indicates the waiting area for this node.
- Is Idle - You should have at least one “Idle” location where the bot can go in between locations. I personally used Limsa. You should never have more than one idle location, as this is not supported and may cause issues.
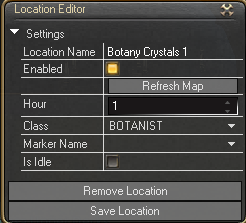
Locations can be edited once saved, and should also be saved while on the map for that particular location.
Enabled - if you want to save this location, but not use it in the active rotation, uncheck this.
SPECIAL NOTES:
- FOR GARDENING ITEMS, YOU CAN NOT PUT THEM IN THE ITEM SLOTS. YOU MUST USE THE “GATHER GARDENING” OPTION ON THE MARKER, AND THE SKILL PROFILE MUST USE TOIL TO UNCOVER THE ITEM.
- If your timing is off, it is most likely your OS clock. You can verify what time it is by checking the “Eorzea Time” in the Advanced Settings window, under “Bot Status” tab.
- The bot is supposed to go to the nodes an hour early.
- You need to use the “Refresh Map” option to refresh some of the dropdowns if locations are added, or if you change maps and need to pull up the list of markers, etc.
Crafting
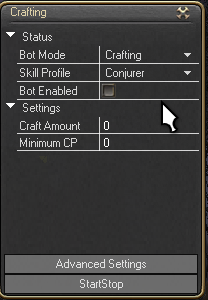
Set your Bot Mode to Crafting
Set the skill profile to the correct class and task that you are gonna be crafting for.
Other Settings:
- Craft Amount: How many Crafts you want to do before it stops.
- Minimum CP: Checks for a minimum cp. If you are doing a craft that requires you have 380 CP and you run out of food buff and drop below that 380 cp the bot will stop crafting.
Then manually select the recipie you wish to craft then enable the bot.
Questing
This Tutorial is going over “How to set up Quest Mode” not how to build quest profiles.
Setup:
First thing you want to do is set the “Bot Mode:” to Quest.
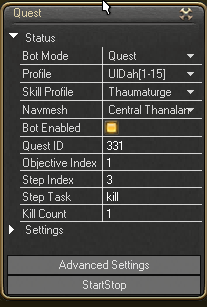
Next you want to choose the profile you wish to run.

Then you want to select the Skill Profile for the class you are running.

Then you can Enable Bot. Its really that simple!!!!!
Advanced Options:
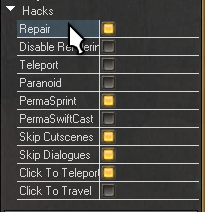
You can enable some of the hacks here if you wish to auto repair or Disable Rendering. But if you use the Teleport hack use at your own risk. TPing in open world is dangerous and you could get reported.
Duty
This guide is going to go over “How to set up Duty Mode”. This is not a tutoiral on how to create duty profiles.
YOU MUST HAVE 4 BOTS TO GROUP UP IN ORDER TO USE DUTY MODE. YOU CANNOT SOLO QUEUE, THE BOT HANDLES ALL THE QUEUEING AND REQUEUEING.
Setup:
To get started the first thing you need to do is set all 4 bots “Bot Mode:” to Duty
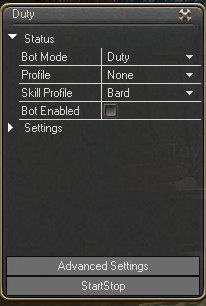
Next you want to set the Profile for the Duty you are going to run.

Next you want to select the skill profile for the class you want to run

Next under the settings tab you can set loot options (if you are doing chest or bosses in your profiles)

Now with v1.5 you can use melee in duty mode!!!! (Make sure not to set your leader as melee ) Enable Telecast for melee characters.
Finally set your reset timer(This is for if for some reason you fail to requeue for the duty it will try to queue again by the value in Seconds you set here.)

A new feature has been added called Performance. You can set at how fast the bot selects the queue for the duty and and goes through the menus.
Once all this is set up and your 4 bots are grouped up you can enable the bots enjoy Duty mode!
PvP
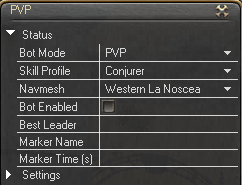
Set your Bot Mode to PVP.
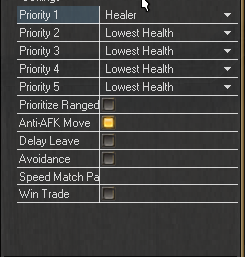
Next you want to set your Priority up. Healer, tank , melee , ranged, lowest health, closest. how ever you want to set it up.
Other Options:
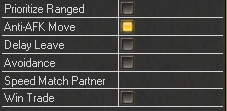
- Prioritize Ranged: Will make you focus on Ranged characters first dispite what you have set as Priority.
- Anti-Afk Move: Will prevent you from going afk before the match.
- Delay Leave: Will Dealy the leaving at the end of the match.
- Avoidance: Similar to Aoe avoidance setting in advance settings this will have you avoid ground aoe.
- Speed Match Partner: In 4v4 pvp you put a name of one of your bots on the other team. Ie. Team one is Bot1-4 Team two is Bot5-8. You would set all of team one up with Bot5's name. then set all of Team two up with Bot1's name. This will cause the bots to TP to the center of the ring when they are verse each other and fight before the initial timer for perpairing is up.
- Win Trade: paired with Speed Match Partner you can trade wins back and forth.
Hunt
Assist
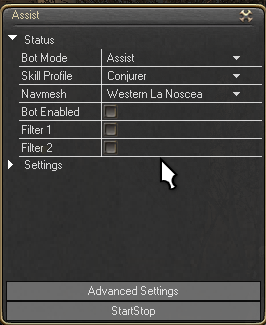
Assist mode is for assissted play. You still control how your character moves, the bot does the rotation for you.
Set your Bot Mode to Assist.
- Skill Profile: The profile that holds the skills you would like the bot to do the rotation for.
- Navmesh: really isnt important for assisted play
- Filter1&2: Enable these filters to do special rotations(these would have to be already set up in the profile. You also can set up hotkeys for these two filters.
Other Settings
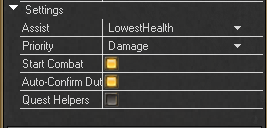
- Assist: You can set this on how you want the bot to target based on lowest health or closest>(setting it to none will require you to choose target)
- Priority: The role your character should focus on.(Damage or Healing)
- Start Combat: If you have assist set up the bot will start attacking as soon as a target meets the requirements.
- Auto_confirm duty: this will auto confirm you in to duty when the commence window pops up.
- Quest Helper: will auto turn in quest items and complete the quest.( you must target the NPC to turn in reward to)
Quick Start
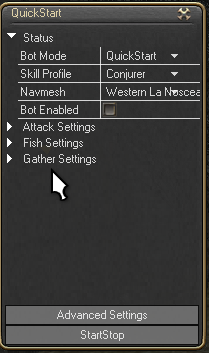
Quick Start is exactly that, Quick and easy way to get started using the bot with minimal set up.
Set your Bot Mode To Quick Start.
- Min Level: The starting level at which you want to start attacking mobs at.
- Max Level: The ending level at which you want to end attacking mobs at.
- COntent ID: The Content ID of the mob you want to farm.( No marker needed)
- Use Mooch: Enables Mooch for where ever you are fishing
- Manually Set the bait for the area you are in.(Be aware the bot will not move from this spot)
- Min Level: Lowest level you want to start gathering at.
- Item Priority1&2: The names spelled exactly as they show up in the list of the items you wish to gather. If prioirty 1 is missing from the list then it will gather priority 2. if both are missing it will gather the first item.
- Content ID: The ID of the type of node you wish to gather from.
Managers
Skill
First you will need to navigate to the Skill Manager it is located under Advanced Settings.
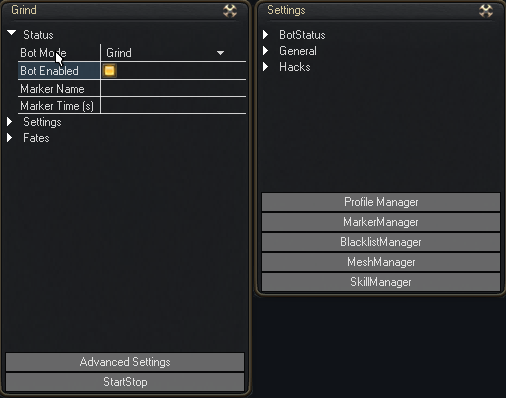
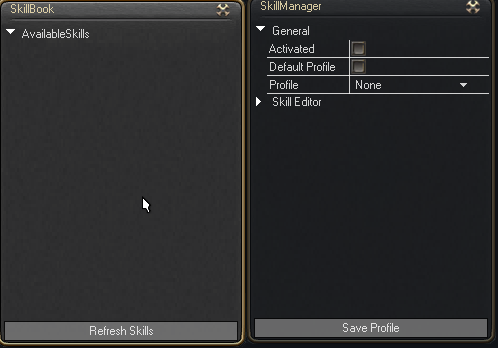
Once you have clicked on the Skill Manager button you will get 2 new windows
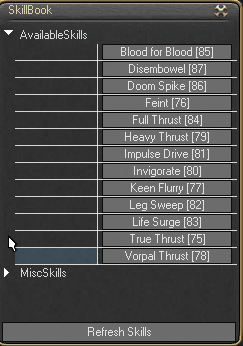
First window Skillbook you can populate the skill book with your skills by hitting Refresh Skills. The skill mananger works as a priority system from top to bottom so remember this when building your profile and adding skills.
MiscSkills will be a list of Skills that may or may not be directly tied to combat. This is where you would find the Limit break skill along with many many other skills.
The Second window Skill Manager is where you will Edit, Set default, name your skill profiles.
As you click skills from your skill book it moves them over to the skill mananger so that you can edit the skills so that they only fire under specific conditionals.
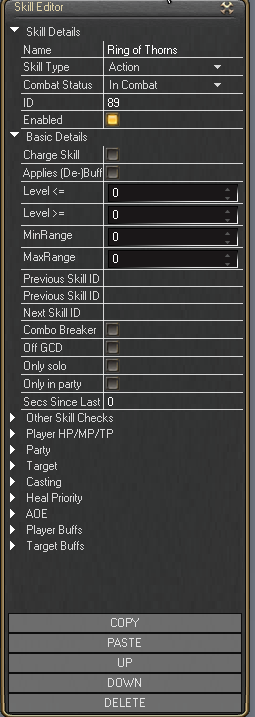
Skill Details:
- Name: Name of the skill
- Skill Type: Action(player skill) or Pet(pet skill)
- Combat Status: In combat only , Out of combat only, or Any combat state.
- ID: the game ID for the skill. This would be used for the Previous skill id for setting up chains with other skills.
- Enabled: If the skill is enabled or disabled.
Basic Details
- Charge Skill: Is this a Gap Closwer skill(i.e. Shoulder Tackle)
- Applies (De-)Buff: Does it apply a buff or debuff either to the player or the target
- Level ⇐: Use this skill by level. If your level is Lessthan or = to the value you put.
- Level >=: Use this skill by level. If your level is Greaterthan or = to the value you put.
- MinRange: Can set the min range to use this skill to target(I.E good for Archer Repelling shot)
- MaxRange: Can set the max range to use this skill to target(I.E good for Archer Repelling shot)
- Previous Skill ID: only use this skill if the ID put here was used before.
- Previous Skill ID Not: never use this skill if hte previous skill was the ID placed here
- Next Skill ID: The ID of the skill to use next
- Combo Break: Tick this if the skill doesnt break combo's
- Off GCD: If the Skill is OFF GCD tick this.
- Only Solo: Only use when solo
- Only Party: Only use when in party
- Sec Since Last Cast: use on a timer based on seconds
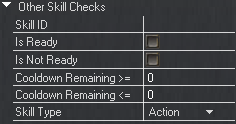
Other Skill Checks
- Skill ID: Skill ID for the skill you wish to check Cooldown on
- Is Ready: Is this skill Ready
- Is Not Ready: Is this skill not ready
- Cooldown remaining >=: Cooldown remaining is Greater then or = to the value you put
- Cooldown Remaining ⇐: Cooldown remaining is Lessthen or = to the value you put
- Skill Type: Player action or Pet action
Marker
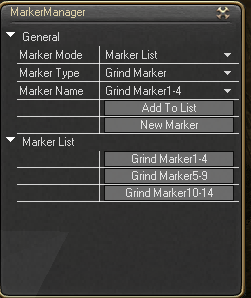
Afer clicking on MarkerManager a new menu will pop up.
You have 3 different Marker Modes. When clicking on the marker mode drop down menu you get these options.
- Marker List: Will go through the list of markers in order either by Time or Level.
- Single Marker: Will Stay at the single marker.(Which is the marker in the Marker name Dropdown menu)
- Random Marker: Will go through the list of markers in a random order based on time.
You have 4 different Marker types you select the marker from the drop down menu.
- Mining Marker: When the bot is in Gather Mode you use this marker to set where you would like to mine. Controlled by time or level
- Botany Marker: When the bot is in Gather Mode you use this marker to set where you would like to Harvest. Controlled by time or level
- Grind Marker: When the bot is in Grind Mode you use this marker to set where you would like to Grind. Controlled by time or level
- Fishing Marker: When the bot is in Fishing mode you use this marker to set where you would like to fish. Controlled by time or level
Other Settings:
- New Marker: Use this to creat a new marker at your current location.
- Add to List: Use this to add a marker to the list that has already been created.( You select these from the Marker Name Drop down Menu)
- Marker Name: is a Drop Down Menu for all the markers on the current mesh for the current marker type. You can select Markers from this menu to add to the Marker list
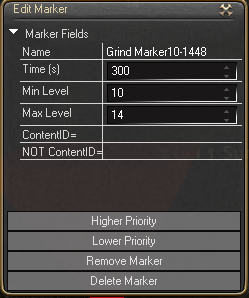
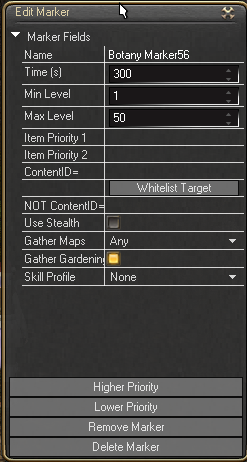
Marker Settings:
- Name: Name of your marker.
- Time(s): Time spent at this marker in seconds.(set to 0 to be controled only by level)
- Min Level: Min Level to start using this marker.
- Max Level: Max Level to finish using this marker.
- ContentID=: Example grind marker, if you put the mob ContentID here it will Fight only this mob(123;456;789)
- NOT ContentID=: Example grind marker, if you put the mob ContentID here it will ignore this contentID. (123;456;789)
- Higher Priority: To move the current Marker Higher in Priority in the list of markers.
- Lower Priority: To move the current Marker Lower in Priority in the list of markers.
- Remove Marker: Removes the current Marker from the list of markers.(will still show up in the Marker name dropdown menu)
- Delete Marker: Deletes the current marker from the mesh and the list of Markers.(Complete deletion of the marker)
Example:
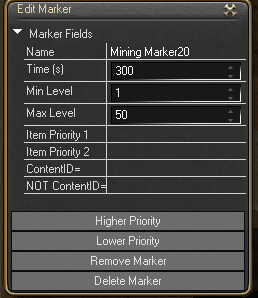
Here is an example of a Gathering Marker. As you can see the Gather Manager has been removed. The priority of items that you wish to gather is now controled by the marker and Marker Manager. Just like the Grind Marker above you have similar settings a couple new ones and a unique way to use some of the settings here are some examples.
- ContentID=: Example Gather Marker, if you put the ContentID here for the Tree nodes it will only Gather this type of node(Whitelist target will auto add the content ID for your target in to this field)
- NOT ContentID=: Example Gather Marker, if you put the ContentID here for the Tree nodes it will ignore this type of node.
However Added to the Gathering Markers are your priority list (also Stealth and Mooch will be found on the edit marker, gather Maps by type is also found here, along with Gathering Gardening materials, furhter more you can set skill profiles on a marker basis.
- Item Priority 1: Is the item name you wish to gather above anything else.(example: Iron Ore NOT iron ore)
- Item Priority 2: Is the itm name you wish to gather if the first item is not present.
In this case here the marker is in the middle of 2 different types of botanist nodes. I can set Priority 1 to be the item i want to gather from trees and the Priority 2 to be the item i wan tto gather from the bushes.
Navigation Mesh
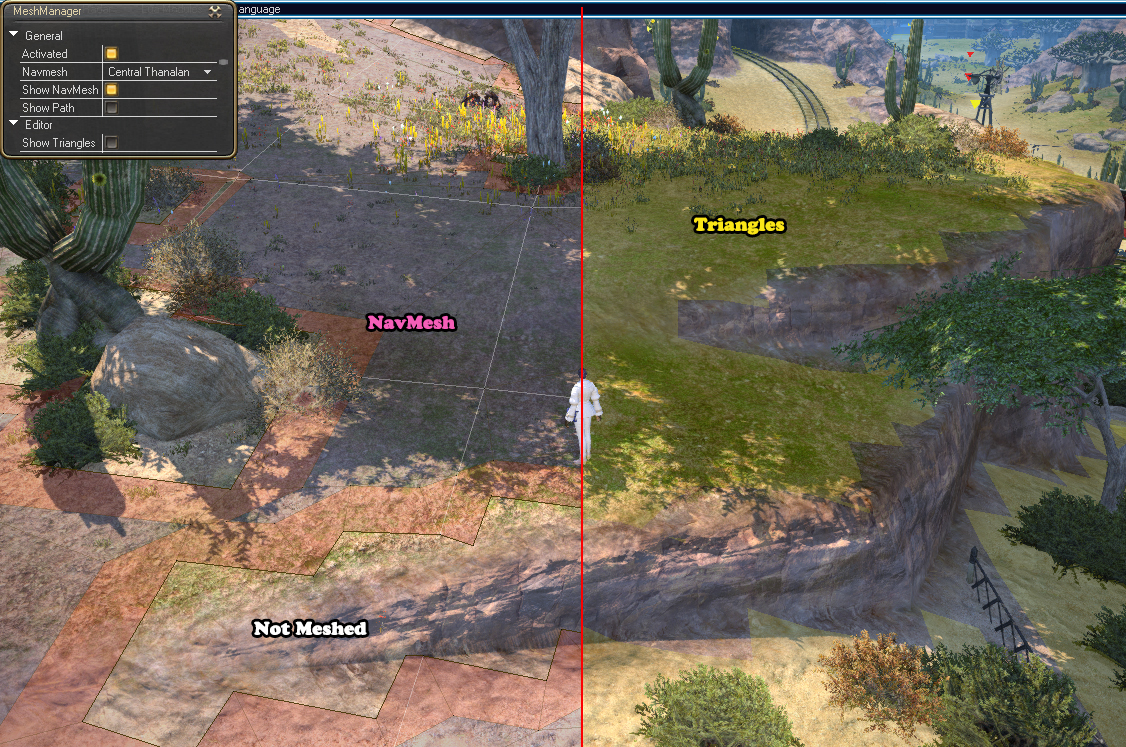
A Navigation Mesh or short NavMesh defines the ground on which the bot can walk. It sits ontop of the level geometry like a second skin and is used for the calculations needed in order to move the bot freely around through the gameworld and to avoid obstacles etc.
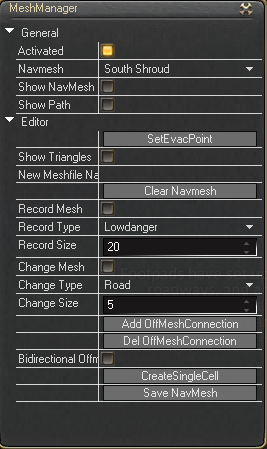
A Navmesh is created from multiple Triangles as basis geometry. With the included MeshManager you are able to create and modify the triangles for the navmesh. After creating enough Triangles, you need to save them ( they will be saved inside the \Navigation\ folder as xxx.obj file). When you press the Save button (or when loading the first time a navmesh), the Real Navmesh will automatically build from the Triangles, this Navmesh is beeing used for the bot to navigate on.
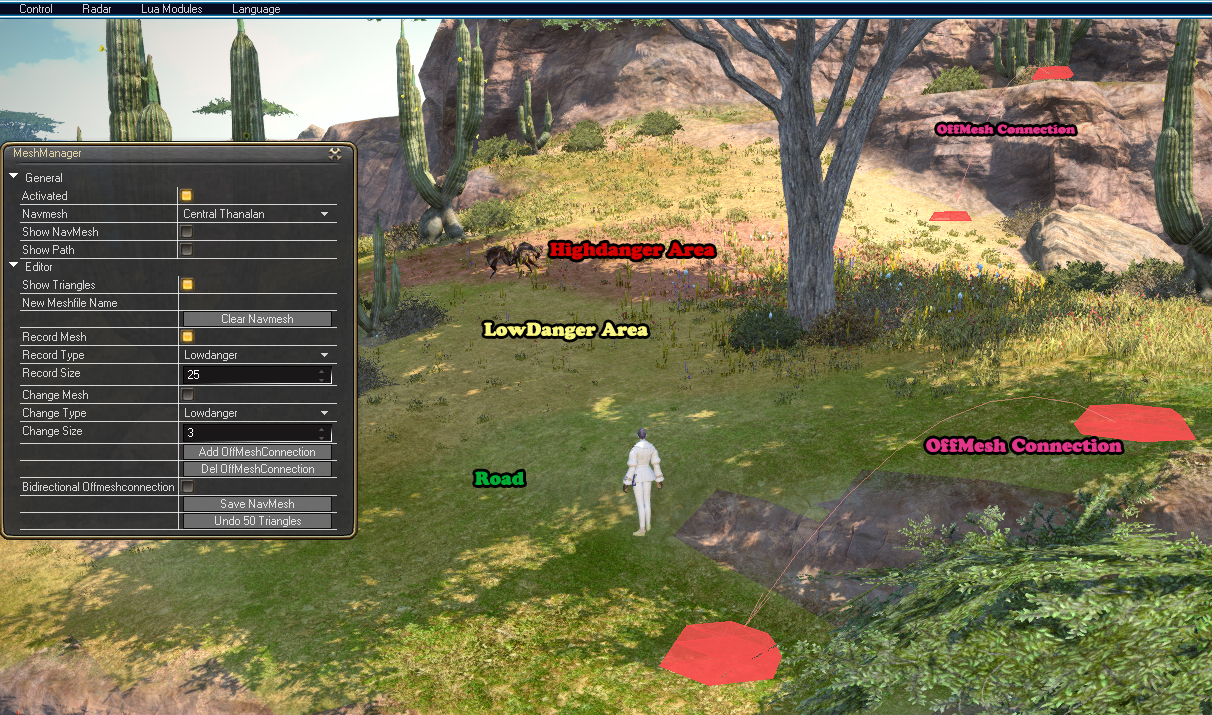
In order for the bot to move intelligently over the maps, avoid obstacles or dangerous areas, walk safely on roads without encountering enemies or even beeing able to jump down ledges or over obstacles, the NavMesh/Triangles can be recorded with different Area-Types, which you can see on the screenshot above.
- Road: Use this for safe roads or places that have no enemies around.
- Lowdanger: This is the default areatype, use this for most of your parts.
- Highdanger: Use this for places which for example have an enemy elite/boss where your bot will probably die when he is alone.
- OffMesh Connections: These can be used for letting the bot know that he has to jump from A to B or jump down a ledge (but never try to go up that way). Read more on them below.
Create your own navmesh:
- If you have already a navmesh loaded for the zone you are in, press the Clear Navmesh button to make a fresh start. Next Click Show Triangles “ and Enable “Nav Mesh”. By default the Record mode areatype is set to Lowdanger. The Record Size is the radius around your player where it will place triangles automatically. Increase/Decrease this according to your needs.
- Now start moving your character and it will automatically place the Triangles around your player. If you continue to record on an already existing mesh or at a different spot, you can force the placement of Triangles by holding down CTRL.
- CTRL: Force placement of Triangles, be careful in using that, it can produce unusable navmesh connections / triangles which will break the navigation of the bot if your character cant walk along these triangles! So use this only when there is no other way and make sure you cleanup / remove not walkable Triangles!!!
- Change Mesh, Change Type and Change Size: can be used to change the AreaType of already placed Triangles around your player, or Delete mesh around your player if you set it to Delete.
- Add OffMeshConnection: Press this button once where you want the bot to start his jump, then move your player where the bot should land, and press this button again. A new connection between these two points will now be shown. Use this to let the bot know where he can jump over or jump down. By default the bot will only jump from start to endpoint, if you want him to be able to jump into both directions, enable the “Bidirectional OffmeshConnection” checkbox, then record the Connection.
- Del OffMeshConnection: Walk to either the Start or the End of an OffMeshConnection and press this button to remove the connection. Note: Each Navmesh can hold only a max of 255 connections!
- When you are done creating enough Triangles, Stop the recording and press the Save NavMesh button in the MeshManager. The NavMesh will now be build from your Triangles.
- Click the “Show Real Navmesh” checkbox to see the new navmesh.
- Done! you have created your own navmesh and the bot can now start using it!
- You can set your evac point by pressing the evac button.
Profile
Profile Manager for making Quest Profiles
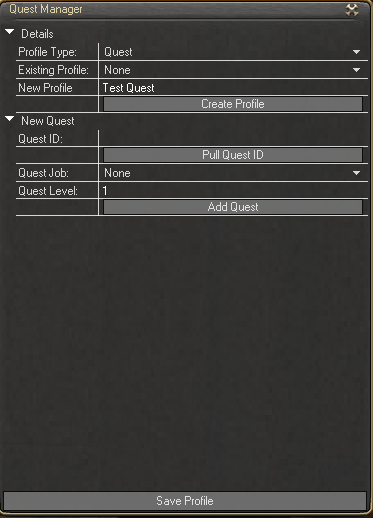
After Pressing the Profile Manager button it will bring up a new UI menu to create your Quest Profile.
Here we will go over some of the options for the Profile Manager(PM)

- Profile Type: Here you can set the type of profile you want to create either a Duty profile or a Quest Profile.
- Exisiting Profile: Here you would select a profile that you have already started and wish to add on to the profile
- New Profile: If you wish to make a new profile you would name it here and then click create profile button.
Now that you have your Quest profile named lets get in to the options for the quest its self.
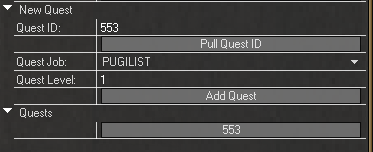
- Quest ID: This is the ID for the current quest. You select the quest in your journal and click the Pull Quest ID button.
- Quest Job: If you have to be a specific class/job for the quest you select the class using the drop down menu.
- Quest Level: Select the level that the quest can be completed at.
After all these options are set you will click the “ADD Quest” button. You now should see your Quest ID listed in the Quests section. Now you will Click the quest to set the steps and options for that quest.
Now we can edit the Pre Req quest(s) for current quest.
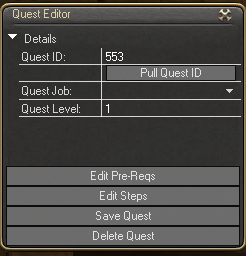
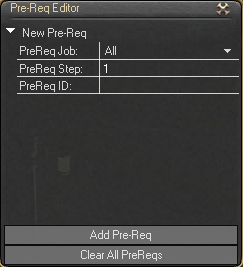
- Edit Pre-Reqs: If the quest requires a Previous quest to be done this is where you edit the Pre-Reqs for the current quest.
- PreReq Job: Select the Class/Job that the PreReq quest requires you to be.
- PreReq Step: This is to list the quests in order that are required to unlock a quest. for example if 1 quest is needed to unlock the current quest you leave this at 1 and then list the prereq id. If you had 2 quest required to unlock the current quest you would Set the first prereq quest to 1 list the ID then the 2nd quest would be set to 2 and then list its ID.(NOTE:most cases this will be left at 1 because quests are done sequentially)
- PreReq ID: This is the ID of the quest that must of been completed before picking up the new quest.
- Add Pre-Req: adds all the pre-req info to the current quest.
- Clear all PreReqs: clears all PreReq info you created.
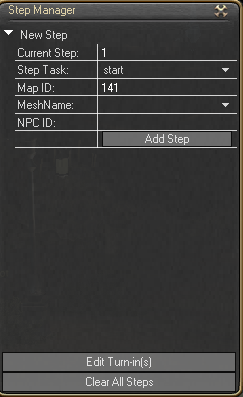
Now We can edit the steps for the current quest
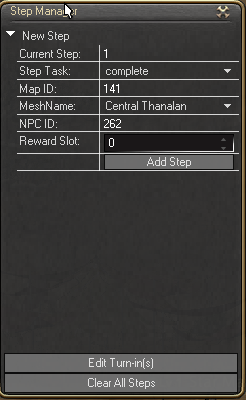
Edit Steps: This is where you would Set the tasks for completing the quest.( Start quest, Kill counts, or item pick ups.)
- Current Step: Quest profiles are broken down in to steps. Each step of the quest will be assisgned a task, map id, mesh name, and NPC ID if it needs to interact with an NPC. You can add Multiple steps per quest and list them in order.
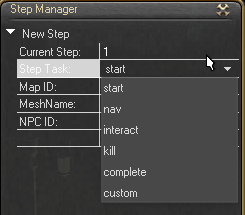
- Step Task: There are currently 5 different types of tasks and 1 custom task this is where you tell this step of the quest what it is going to perform.
- Start: This is where you start the quest and the first step, You set the Map ID Mesh name you want to load the ID for the NPC quest giver and then click add step.
- Nav: Setting a NaV steps instructs the bot to navigate to specific x,y,z cords ( this typically wont ever be used the bot knows how it needs to navigate to get from one map id to the next.)
- Interact: Able to use this to interact with NPCs for quests or Objects for quets. Like say you have to untie some NPCs or you need to interact with items on the ground, you would use this task. Can add a dealy in (ms) before moving to the next item/npc for the cast time of the interact.
- Kill: This task is used for kill count quests target the mob and add how many you are suppose to kill for the Kill count and then add step.
- Complete: This task is used for turning in the quest once you have completed it. here you set hte map id mesh name and NPC ID that you need to turn the quest in to, also reward slot.
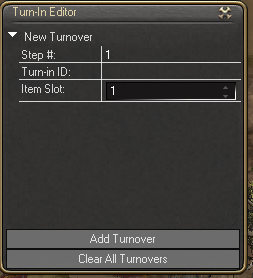
At the bottom of the Step Manager you have edit Turn-ins. This is where you add the Id Number of the items and which slot the go into. So say you have to pick up 3 items from a quest to turn in to an NPC, This is where you set up The ID+Slot in the turn in window to the NPC.
- Add Step: after you have chosen what type of step you want to do you click this button to add the step.
- Save Quest: This saves all quest info to the current profile.
- Delete Quest: This removes the current quest from the profile.[/spoiler]
- Save Profile: Finaly once you have set up your profile and entered all the quests you click Save Profile to write the profile to a file.
Blacklist
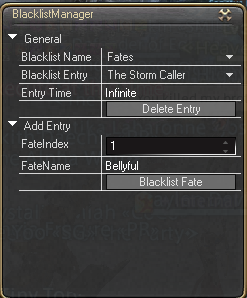
Alows you to Black list certain fates, mobs, aoes. You set the Blacklist name drop down menu to select the different things you want to black list. then you the add entry section to select the exact mob or fate or aoe you wish to black list. USe the Delete entry button to remove the item from the black list.
Multibot
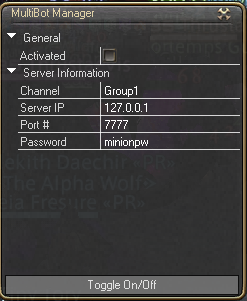
Works with the Multibot server, you can add specific bots to certain teams so that they can communicate with each other. this is a very advanced feature and requires Multibot server set up and one of 2 Lua Addons to make use of the connection. Basically the Multibot manager is just a tool to set up the connection in its self it does not perform any other tasks then communicating with the multibot server and joining specific groups.
Use this addon http://www.mmominion.com/Thread-Module-Controller-1-07 to control multiple bots from one bot.
This is a small module I built to utilize the multibot server that is not used in FFXIV currently. The initial release only does 3 things, but it is expandable, customizable, and allows users to add their own files in as well.
The controller addon will allow users with the click of one button to accomplish things such as: - Stop/Starting all bots. - Reloading modules on all bots. - Reconfiguring bot teams for duty without having to access your team mate's computer. - Returning all bots to a certain location - The list goes on.. any and all things that require inter-bot communication can be accomplished (generally speaking).
Installation
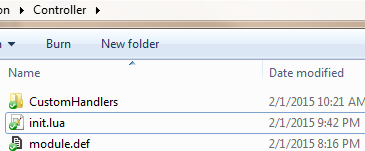
Module should be installed into the <Your Minion Directory>\LuaMods\Controller.
Custom Handlers (1 provided, all customs placed here):
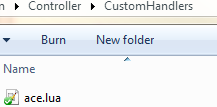
Server Setup - Local
To start, you will need the MultibotComServer application, which must be started, and settings.ini file configured however you'd like it to be (mostly you need to know/set the password in the [server] section).
Multibot Manager Setup
The multibot manager UI can most easily be found by going to the LuaMods in the top bar. You will need to enter the IP address, port, password and channel.
Bots will only receive commands from bots in their channel, so make sure you join the correct channel. The channel name should also be unique enough to avoid overlap with other teams if using a hosted/shared server.
Advanced Settings
First things first you will want to click the Advanced Settings Tab.
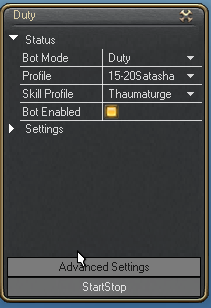
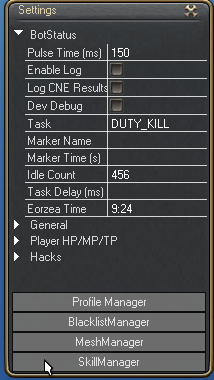
You should get a window that looks like this.
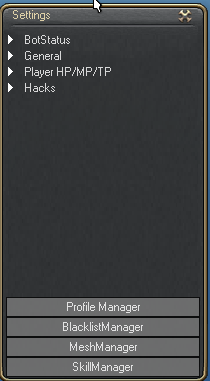
The advanced settings window contains settings that are typically GLOBAL settings. These settings will effect every mode you are in. Unlike the settings tab that shows up on the main bot window which are specific settings that only effect the mode you are currently in.
BotStatus: This is kinda a settings and information tab. It will give you information about what current taks you are in, marker name/timer, game time along with counts and timers for the current task you are doing. This is where you can enable log and cne log, so that you can get more information on what currently the bot is doing.(helpfull information when you are reporting a bug)
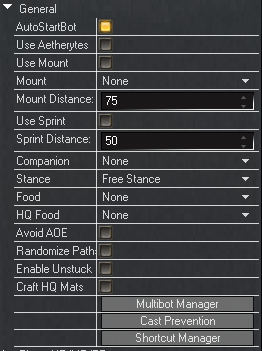
General: This will hold most of the important settings that you will need in game.
- Autostartbot: Which when enabled will you guessed it, auto start the bot once the gui_launcher launches the game.
- Use Mount: Will enable the bot to mount up bewteen combat. Used in modes such as Grind, Fates, Atama, Hunts, Questing
- Use Mounts: When Mount is enabled you can choose your mount from this drop down menu.
- Mount Distance: When Mount is enabled you can set the distance at which the bot will choose to mount. If the destination is above this setting the bot will mount and then dismount once it gets to the destination.
- Use Sprint: similar to Use mount when this is enabled the bot will use the sprint ability inbetween combat.
- Sprint Distance: just like Mount distance this will set the distance at which the bot will use the Sprint Ability.
- Companion: Choose what mode you want the bot to summon your chocobo companion to fight with you. IE. Assist, Grind, Any.
- Stance: When you summon your chocobo what stance you want it to be in. IE. Defender Attacker Healer or Free stance.
- Food: drop down menu on which food you want to use.
- HQ Food: What HQ food you want to use.
- Avoid Aoe: This will Avoid Aoe in specific modes, Grind,Quest,Hunts.
- Randomize Path: The bot will try to create an unique path from your position to your destination.
- Randomize Movement: This is for melee it will slightly move your character to different positions around the mob, so you do not seem to be just standing there.
- Enable Unstuck: when you are stuck it will attempt to use the in game telepot function still pretty buggy i wouldnt enable it yet.
- Craft HQ Mats: Enable this for crafting to use HQ materials while crafting.
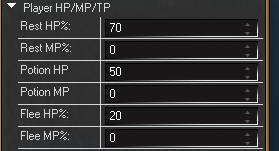
Player HP/MP/TP: This is the setting for controling when yoru character Rests/Flees combat/ or take potions. also you can set it to HP value for when you want to start avoiding AOE, IE. if at 50% it will not avoid aoe till your character is below 50% hp.
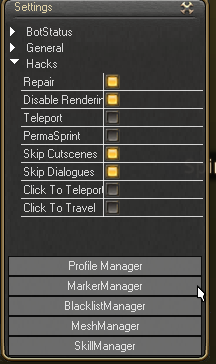
- Hacks: This is where you can enable Repair, Disable Renders, Teleport, Perma Sprint, Skip Cutscenes, Skip Dialogues, Click to Teleport and Click to travel.
- Click to Teleport: CTRL+SHIFT+click on map
- Click to Travel: Ctrl+click on map
- Paranoid: New feature added, When enabled it will not Teleport if Characters are with in 30y.
- Stealth Detect Range: Determines what distance from an aggressive mob the bot will enter stealth.
- Stealth Remove: Determines what distance after passing an aggressive mob the bot removes stealth.
- Use Defaults: set the bot back to default values.
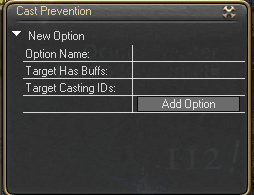
Cast Prevention
- Option Name: Name the new option
- Target Has Buffs: enter the buff id here if the target has the buff the bot will stop casting
- Target Casting Id: enter the spell ID of the skill if the target is casting that spell the bot will stop attacking.
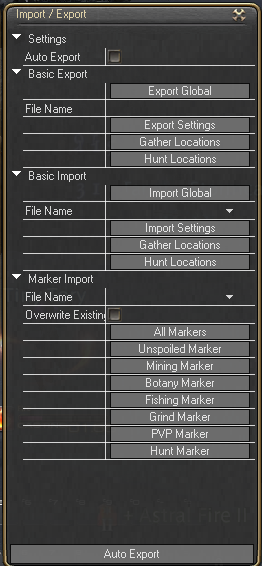
Import/Export
You can use this to export your global settings, Marker settings to share with other people, Or import settings from other community members.

